

How to Secure a Wig Without Glue: Easy, Comfortable Methods
Ever wonder how to get that rock-solid wig security without touching a drop of glue? It all comes down to two things: a great foundation and the right friction-based tools. Think wig grips, clips, and those handy adjustable straps. The real secret isn't some complicated trick; it's just about prepping your natural hair correctly and picking the best method for your wig and your lifestyle.
These techniques give you a secure, comfortable hold that lasts all day, minus the mess and potential scalp irritation that comes with adhesives.
Building Your Foundation for a Secure Glueless Fit

Before you even reach for a wig grip or clip, let's talk about what's underneath. The success of your glueless install lives or dies by your hair prep. You simply can't get a flawless, secure fit without a flat, smooth base.
This initial work is what prevents lumps, stops the wig from shifting, and makes sure it sits flush against your scalp for that "is it hers?" natural look. So many people try to rush this part, but it's absolutely non-negotiable for comfort and stability.
Trying to put a wig on over loose, unprepared hair is like trying to build a house on shaky ground—it’s just not going to be stable. A few extra minutes prepping your hair is truly the difference between a wig that feels like an extension of you and one that feels like a hat ready to take flight.
Choosing Your Base Style
The main goal here is simple: get your natural hair as flat and compact as you possibly can. Bumps and bulk are the enemies of a seamless wig application. The best style for you will really depend on the length and thickness of your hair.
- Cornrows: This is the undisputed champion for creating a super flat surface. Simple straight-back cornrows are perfect for most wigs, giving you evenness and solid anchor points for any built-in clips.
- Flat Twists: A fantastic alternative, especially if you find cornrows a bit too tight or just want something gentler on your edges. They lay beautifully flat against the scalp.
- Low Bun or Ponytail: If your hair is on the shorter or finer side, a tightly secured low bun right at the nape of your neck can do the trick. Just make sure it's completely flat and not creating a noticeable bulge under the wig.
The key is consistency. A lumpy base won't just look off; it will create weird pressure points under the wig, leading to headaches and causing the wig to sit unevenly.
The Role of a Quality Wig Cap
Once your hair is neatly braided or tucked away, a wig cap is your next critical layer. It’s so much more than a simple barrier—it’s a key piece of your security system.
A good wig cap neatly contains all your braids, tames any little flyaways, and creates a smooth, uniform surface for the wig to grab onto. To get that extra bit of protection and grip, we always recommend a breathable natural stocking wig cap.
It also does the important job of protecting your natural hair from friction against the wig’s inner cap, which helps prevent breakage over time. You want the cap to feel snug, but not so tight that it's uncomfortable. A loose cap will just slide around, and it'll take your wig right along with it. This one small, inexpensive accessory is a true cornerstone of a secure, glueless fit.
Mastering the Wig Grip for All-Day Security
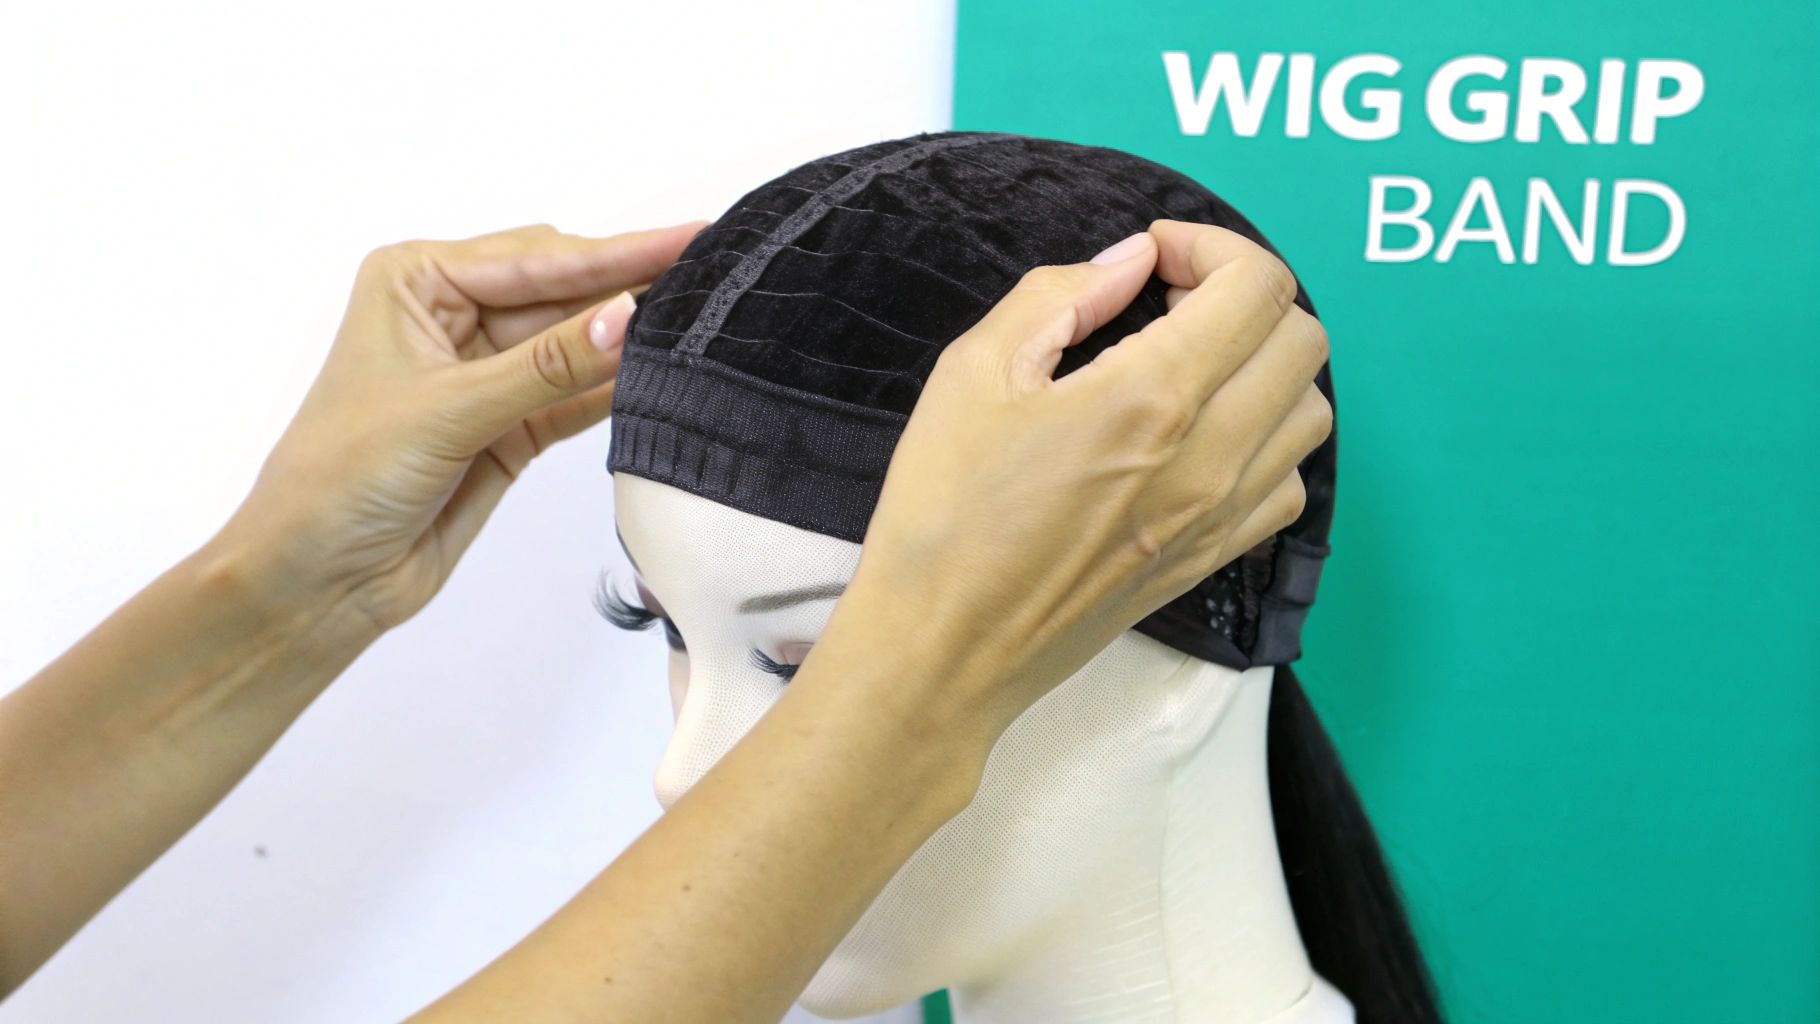
If you're on the hunt for a simple, effective, and totally glue-free way to lock your wig in place, the wig grip band is about to become your new best friend. This clever little accessory is usually a soft, adjustable headband made of velvet or silicone, and it's a true staple for anyone wanting all-day security without the mess and stress of adhesives.
So how does it work? The magic of the wig grip comes down to one simple principle: friction. The unique texture of the band grips both your scalp (or wig cap) and the inside of your wig, creating a secure, non-slip layer. This stops your unit from sliding backward, shifting sideways, or lifting at the edges. Best of all, it distributes the hold evenly, which helps eliminate those nasty tension headaches that can come from clips or overly tight straps.
Choosing the Right Wig Grip
Not all wig grips are created equal, and the two most common types have distinct advantages depending on what you need.
- Velvet Wig Grips: These are exceptionally soft and comfortable, which makes them a dream for anyone with a sensitive scalp. The nap of the velvet fabric is directional, creating a gentle but surprisingly firm hold.
- Silicone Wig Grips: Often transparent or skin-toned, these grips offer a slightly more intense hold. The silicone creates a subtle suction-like effect against the skin, making it a fantastic choice for those with total hair loss or anyone with a very active lifestyle.
For many people, the wig grip has become the absolute go-to glueless solution. It's especially valued by those who need a reliable hold but want to avoid potential scalp irritation from tapes or glues. In fact, it's favored by over 80% of alopecia sufferers and chemotherapy patients surveyed in beauty forums. Data also shows this method can prevent up to 85% of backward slides—one of the most common complaints from wig wearers. You can explore more insights on why this method is so trusted on thelaurenashtyncollection.com.
Perfecting Your Wig Grip Placement
Getting the placement right is everything. It’s the key to maximizing your wig grip's power while keeping it completely hidden under your wig.
First, position the band around your head so it sits about a half-inch to an inch behind your natural hairline. If you place it directly on the hairline, it’s much more likely to peek out from under your wig's lace.
Next, fasten the velcro closure at the nape of your neck. You want it to be snug enough that it doesn’t move, but not so tight that it causes discomfort. A good rule of thumb is that you should be able to slide a finger underneath it easily.
With the grip in place, you can now put on your wig. I find it’s best to gently slide the wig on from front to back, making sure the front edge of the wig lines up just in front of the wig grip band.
Pro Tip: If your wig has built-in combs, you can slide the front comb into the wig grip band itself for an extra layer of front-line security. This creates an incredibly stable anchor point that really locks things down.
The wig grip is an amazing tool on its own, but it also pairs beautifully with other methods for even more stability. If you need maximum hold, consider sewing one of our sleek elastic hair bands into your wig for additional security at the nape.
Tapping Into Your Wig’s Built-In Security
Before you rush out to buy a single accessory, let's talk about what your wig already has. Most quality wigs come with some seriously handy built-in features that are designed to give you a snug, secure fit from the get-go. Honestly, learning how to use these correctly is often all you need for a solid, everyday hold.
Think of these features as your secret weapons. They're part of the wig's design, so they provide a great grip without adding any extra layers or bulk. It’s the smartest place to start your glueless journey.
Mastering the Adjustable Straps
Probably the most important—and most ignored—feature is the set of adjustable straps you'll find at the nape of the wig. These little elastic bands, usually with a simple hook or a sliding clasp, are there for one reason: to let you customize the wig's size to fit your head perfectly.
Getting the tension right is everything. You want it to feel snug, not like it's in a death grip. A good rule of thumb is to tighten the straps just enough so the wig doesn't budge when you shake your head, but not so tight that you feel any pressure or the beginnings of a headache. This one small tweak makes a world of difference.
Did you know that properly using the adjustable straps inside wig caps can prevent up to 70% of common wig slipping issues? Wig experts confirm that this small tweak creates a customized fit that solves one of the most frequent complaints from wearers. You can learn more about how to perfect your wig security on keswigs.com.
Using Combs and Clips the Right Way
Besides the straps, you've probably noticed the small combs or clips sewn right into the wig cap. They're usually placed at the temples, the crown, and the back near the nape, giving you several anchor points to really lock your wig in place.
But here’s the thing: you have to actually use them. Don't just let them sit against your head. You need to slide them into your natural hair (or wig cap) so they have something to grab onto. For the best possible hold, make sure they catch a solid part of your braided-down hair.
- Temple Combs: These are your best friends on a windy day. They stop the sides of your wig from lifting up and giving you away.
- Crown Clips: A clip at the top is great for stopping the whole wig from sliding backward as you go about your day.
- Nape Combs: The comb at the back is the perfect partner for the adjustable straps, working together to anchor the entire wig down.
When you take a minute to engage these features, you transform your wig from something that just sits on your head to something that feels like it was made for you. It’s the easiest, most direct way to get a secure hold without adding a single product to your routine, and a crucial first step in learning how to secure a wig without glue.
The Ultimate Hold: The Sew-In Elastic Band Method
If you're looking for a truly unshakeable, set-it-and-forget-it hold, the sew-in elastic band is your new best friend. This is the technique stylists and long-time wig wearers swear by for creating a fit that feels completely custom and secure. It’s a game-changer.
By sewing a strong elastic band from ear to ear inside your wig, you create an anchor that sits snugly at the nape of your neck. This simple addition makes it nearly impossible for your wig to lift in the back or slide around, even on a windy day or during a workout. It’s perfect for lace frontals or any unit where you need that extra peace of mind.
What You'll Need to Get Started
Getting a professional result means starting with the right tools. You can't skimp here. Make sure you have a thick, durable elastic band—I've found that one that's about 1 to 1.5 inches wide offers the best balance of strength and comfort. A flimsy band will just dig into your skin and lose its stretch over time.
Here's your checklist:
- A sturdy, curved weaving needle
- Strong weaving thread (try to match it to your wig's cap color)
- A flexible measuring tape
- A sharp pair of scissors
Having a quality weaving set with needles and thread makes a world of difference and keeps the whole process running smoothly.
How to Measure and Sew for a Flawless Fit
The secret to this method is all in the tension. You want it snug enough to hold everything in place, but not so tight that it gives you a headache. It's a delicate balance.
First, put the wig on to find the perfect placement for the band. It should run from just behind one ear tab, wrap down around the base of your skull (the nape), and connect to the spot just behind the other ear tab.
Now, grab your measuring tape. Measure that exact path from ear to ear. As you measure, stretch the elastic band just a little bit to see how it will feel when it’s snug against your head. Cut the band to that measurement.
Finally, it’s time to sew. Using your curved needle and thread, attach each end of the band securely to the inside of the wig, right behind those ear tabs. Don't be shy with the stitches—use tight, looping stitches and go over them a few times to make sure they can handle the constant tension.
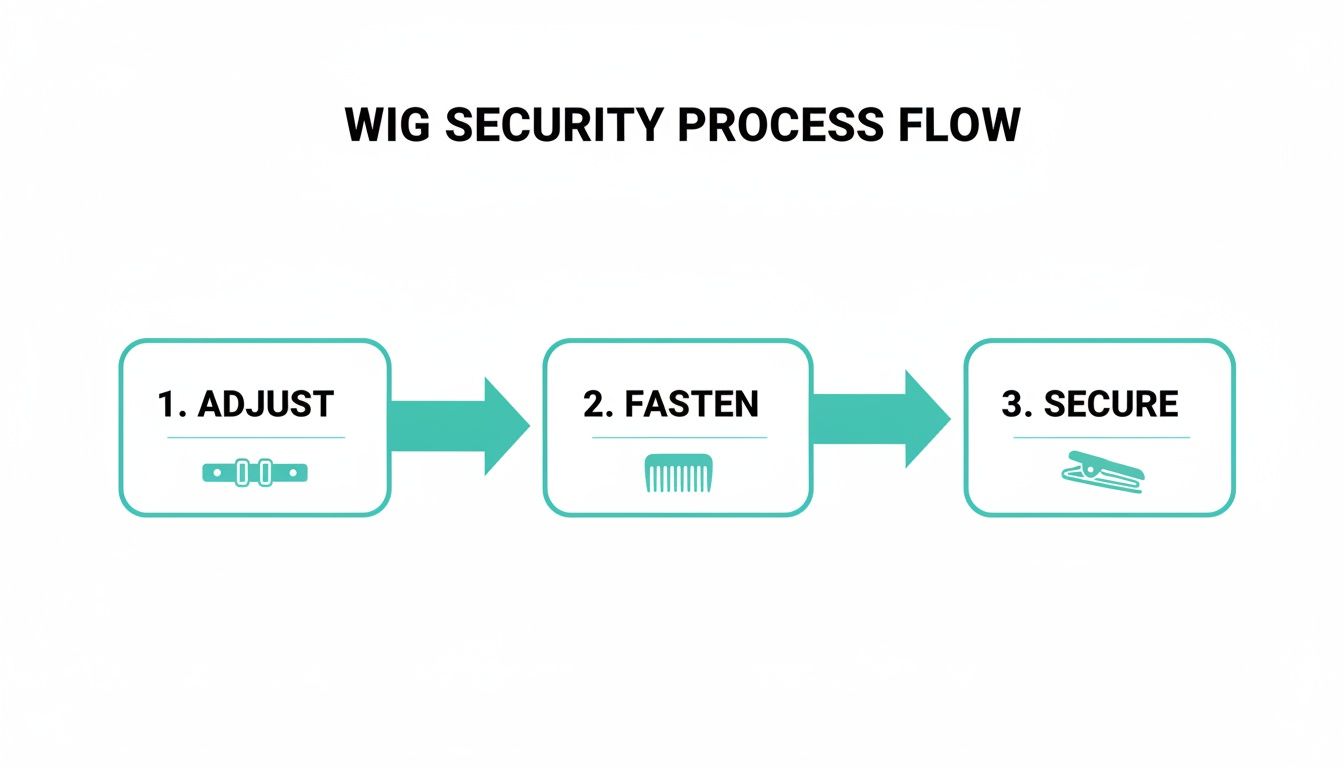
Think of the sew-in elastic band as a major upgrade to the built-in adjustable straps shown in this process. While those straps are great, a custom-sewn band takes the security to a whole new level, giving you a truly locked-in feel.
How to Combine Methods for a Windproof Hold
Sometimes, one method just isn't enough. A quiet day at the office is one thing, but what about a windy commute or a long night of dancing? For those times when you need your wig to be completely unshakeable, layering a few glueless techniques is the secret to total peace of mind.
Think of it less as just putting on a wig and more as building a custom security system for your head. By combining methods, you're not relying on a single point of failure. You're creating a network of support that distributes the hold, boosts comfort, and keeps everything locked down, even if one element shifts a bit.
The Power Duo: Wig Grip and Built-In Clips
This is probably my favorite go-to combination for a reason: it’s simple, fast, and incredibly effective. The wig grip gives you that all-over friction to stop any major sliding, and the wig’s built-in clips or combs act as firm anchor points. They work together beautifully.
First, position your wig grip just a little bit behind your natural hairline. Then, when you put your wig on, make a point to slide the front and side combs directly into the fabric of the wig grip band. This one little move mechanically locks the wig's perimeter to the grip, making it nearly impossible for the front or sides to lift up unexpectedly.
Anchoring with Bobby Pins for Targeted Security
Never underestimate the power of a well-placed bobby pin. They are absolute lifesavers for targeting specific problem areas, like the temples or the nape of the neck, which are notorious for shifting.
But there’s a trick to it.
Pro Tip: Don't just slide a bobby pin in and hope for the best—that won't hold anything. For a real anchor, open the pin and weave it through the wefts of the wig cap first, then push it securely into your braided base. This creates a direct connection between the wig and your foundation.
This method gives you a truly customized hold. If your left temple feels a little loose, a single pin can fix it without you having to take the whole unit off and start over. In fact, bobby pins and sewn-in clips offer a solid, medium-strength hold for 75% of wearers with medium-to-thick hair, outperforming single methods by 50% when layered. This powerful duo is even shown to fix side slips in 70% of cases. You can discover more insights about strategic wig security on oreateai.com.
The Ultimate Combination: Elastic Band Plus Pins
When you absolutely, positively cannot have your wig move, this is the combo you need. A sewn-in elastic band provides that firm, consistent tension around the back of your head, pulling the lace down snugly at your nape. It’s the foundation for a truly windproof hold.
Once the band is doing its job, add two to four bobby pins at the temples and just above your ears, weaving them through the wefts and into your braids. This creates a full 360-degree security system, keeping the wig flush against your scalp from every angle. You’ll have the confidence to face anything without a single worry about your wig.
Answering Your Top Glueless Wig Questions
Even when you've got the best techniques down, you're bound to run into a few hurdles. Let’s be real, getting a glueless install just right is a skill you build over time. Having the right answers when things go wrong can save you a ton of frustration. We'll walk through some of the most common questions and give you practical solutions for a fit that feels both comfortable and completely secure.
From a unit that just won’t stay put to making sure that lace actually looks like your scalp, we've got you covered.
Can I Really Make a Lace Front Wig Look Natural Without Glue?
Yes, 100%. Getting that seamless, "is that her real hair?" look without a drop of glue is all about the details. It's not one magic trick, but a combination of smart prep and a little finessing. Honestly, the most important work happens before the wig even touches your head.
Your foundation is everything. First, get your natural hair as flat as you possibly can—cornrows are your best friend here. Then, pop on a good quality wig grip band right behind your hairline. This little accessory is a game-changer; it creates the friction needed to help the lace lay down perfectly flat.
Pro Tip: If you want a truly undetectable finish, you have to customize the lace. Tinting it to match your skin tone and carefully plucking the hairline to mimic your own is what separates a good install from a flawless one.
Finally, make use of the tools the wig gives you. Secure the built-in combs into your braids and give those adjustable straps at the nape a good Cinch. This combination—a flat base, a wig grip, and the wig's own security features—is the secret to a hold that’s not only secure but also looks incredibly natural.
What Should I Do If My Wig Keeps Slipping Backwards?
Ugh, the dreaded backward slide. It’s one of the most annoying wig problems, but thankfully, it’s almost always an easy fix. The culprit is usually a lack of friction. If you're wearing a silky wig cap, your wig has nothing to grab onto, so it's going to slide around with every head turn.
The single best solution is a velvet or silicone wig grip band. Seriously, these things are designed specifically to create the grip needed to stop that backward motion dead in its tracks.
Also, don't sleep on those adjustable straps at the back of your wig. When you tighten them, you create a solid anchor at the nape of your neck that works against any backward pull. A wig grip band plus properly adjusted straps is the power duo that will keep your unit locked in place all day long.
How Do I Stop Getting Headaches from a Tight Wig?
If you're getting headaches, your wig is definitely too tight. The goal is a snug, secure fit, not a painful, scalp-squeezing one. This is a super common mistake people make when they're worried about their wig falling off and end up over-tightening everything.
-
If you're using the adjustable straps, loosen them a notch or two. You should be able to slide a finger under the band at your nape without a struggle. If you can’t, it’s too tight.
-
A wig grip band is also a great solution here. It distributes the pressure evenly around your head instead of concentrating it in one or two spots like clips or tight straps can.
-
The sew-in elastic band method is another fantastic alternative. When measured correctly, it provides a firm hold that feels supportive, not constricting.
Perfecting your glueless wig application starts with having the right tools for the job. From premium hair to essential accessories, Elise Beauty Supply has everything you need to build a secure foundation for any style. Explore our collection and find your perfect fit today at Elise Beauty Supply.