
A Practical Guide to Caring for Braided Hair
The secret to braids that look incredible for weeks on end? It all starts before you even sit in the chair. Think of it this way: a beautiful, long-lasting protective style can only be built on a strong, healthy foundation. Taking the time to properly prep your natural hair is the single most important thing you can do to prevent breakage and encourage growth while it's tucked away.
Setting the Stage for Long-Lasting Braids
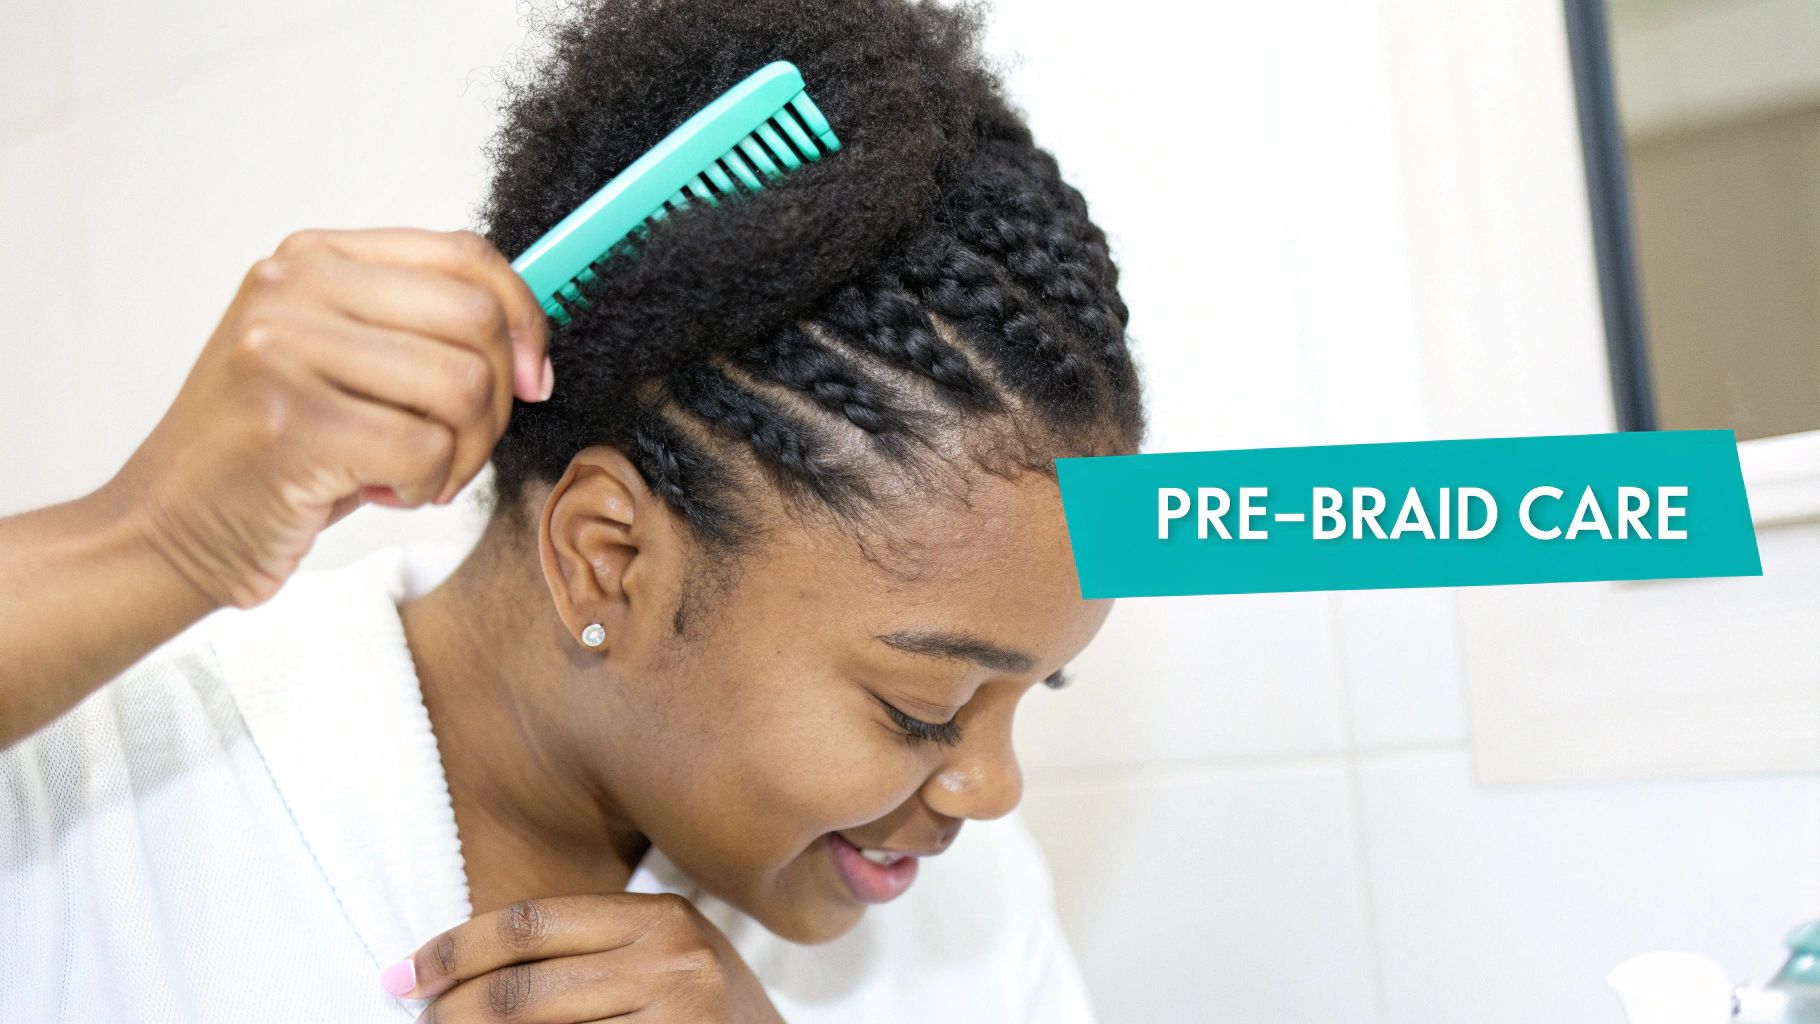
I like to think of pre-braid prep as priming a canvas before creating a masterpiece. If you skip this, you’re basically setting yourself up for potential issues like frustrating dryness, mid-style breakage, and an annoyingly itchy scalp. When you do it right, you not only get more mileage out of your style, but you also ensure your natural hair comes out of the braids looking and feeling even healthier than it went in.
This isn't just about giving your hair a quick wash. It's a deliberate routine of deep cleaning, moisturizing, and strengthening every single strand.
First, A Deep Cleanse and Hydration Boost
You have to start with a completely clean slate. Grab a good clarifying shampoo to wash away every last trace of product buildup, oils, and environmental gunk. This step is crucial because it allows your hair to actually drink up all the moisture you're about to give it.
Right after clarifying, go in with a rich, super-hydrating deep conditioner. Honestly, if you only do one thing, make it this. Let that conditioner work its magic for at least 20-30 minutes. For an even deeper treatment, sit under a hooded dryer or use a thermal cap—the heat helps the conditioner penetrate the hair shaft for maximum impact. You're essentially creating a moisture reserve that will keep your hair happy while it’s braided up.
I see this mistake all the time: people install braids on hair that's only clean on the surface. That deep conditioning step after you clarify? That's what really fortifies the hair, making it pliable and resilient enough to handle the tension of a fresh install.
Next, Detangle and Strengthen Your Strands
With your hair still slippery and saturated with conditioner, it’s time to detangle. Please, be patient here! Work in small, manageable sections and use your fingers or a wide-tooth comb. Always start from the ends and gently work your way up to the roots to avoid creating weak spots or causing unnecessary breakage.
This is also the perfect moment to check in with your hair. Does it feel a bit too soft or mushy? That could be a sign it needs a little protein. A light protein treatment can work wonders to reinforce your hair's structure, making it much stronger and better prepared for the weight and manipulation of braiding. In fact, gentle pre-braid detangling has been shown to reduce tension-related hair loss by up to 35%, which is a huge deal for frequent protective stylers.
Here's a quick rundown to make sure you've got all your bases covered.
Your Pre-Braid Hair Prep Checklist
This simple checklist will walk you through the essential steps to get your hair perfectly primed for braids, ensuring your style lasts longer and your natural hair stays healthy underneath.
| Prep Step | Why It's Crucial | Elise Beauty Supply Product Tip |
|---|---|---|
| Clarifying Wash | Removes all product buildup and residue so your hair can absorb moisture. | Try the African Pride Moisture Miracle Honey & Coconut Oil Shampoo for a deep clean that doesn't strip. |
| Deep Condition | Infuses your strands with intense, lasting hydration to prevent dryness. | Mielle Organics Rosemary Mint Strengthening Hair Masque is a powerhouse for this step. |
| Thorough Detangle | Prevents weak spots and breakage during the braiding process and takedown. | A good wide-tooth comb and your fingers are your best friends here. |
| Protein Treatment (Optional) | Reinforces the hair's structure if it feels overly soft or weak. | Assess your hair's needs; use a light treatment if you notice a lack of elasticity. |
| Trim Your Ends | Stops split ends from traveling up the hair shaft and causing more damage. | Use sharp, dedicated hair shears for a clean cut. |
| Moisturize & Seal | Locks in hydration with a leave-in and oil to keep hair soft and pliable. | Use the LOC/LCO method with a product like Camille Rose Naturals Curl Love Moisture Milk. |
Following these steps sets the stage for a flawless installation and healthy hair journey.
Finally, Get Rid of Those Ends and Lock in Moisture
Take one last, honest look at your ends. See any splits or scraggly bits? Trim them off. It's non-negotiable. Leaving split ends is just asking for them to travel up your hair shaft, creating more damage while your hair is styled. A fresh trim keeps everything healthy from top to bottom.
The very last step is to layer on the moisture. Apply a good leave-in conditioner, then seal all that goodness in with a quality oil. Whether you prefer the LOC (Leave-in, Oil, Cream) or LCO (Leave-in, Cream, Oil) method, this final hydrating layer is what keeps your hair soft and moisturized as it goes into the braids. Of course, the hair you choose matters, too! For more on that, read our guide on how to pick the best braiding hair for your box braids. The right hair makes all the difference.
How to Properly Wash Your Braids
The idea of washing a full head of braids can feel a little daunting, I get it. But it’s easily one of the most important parts of keeping your hair healthy underneath that beautiful style. A clean scalp is everything, and regular washing is what stops the buildup that causes itchiness, flakes, and that dreaded stale smell.
You have to forget everything you know about a traditional hair wash. When you have braids, the game changes. Your entire mission is to cleanse your scalp without creating a frizzy mess. The right technique makes all the difference between refreshing your style and accidentally cutting its lifespan short.
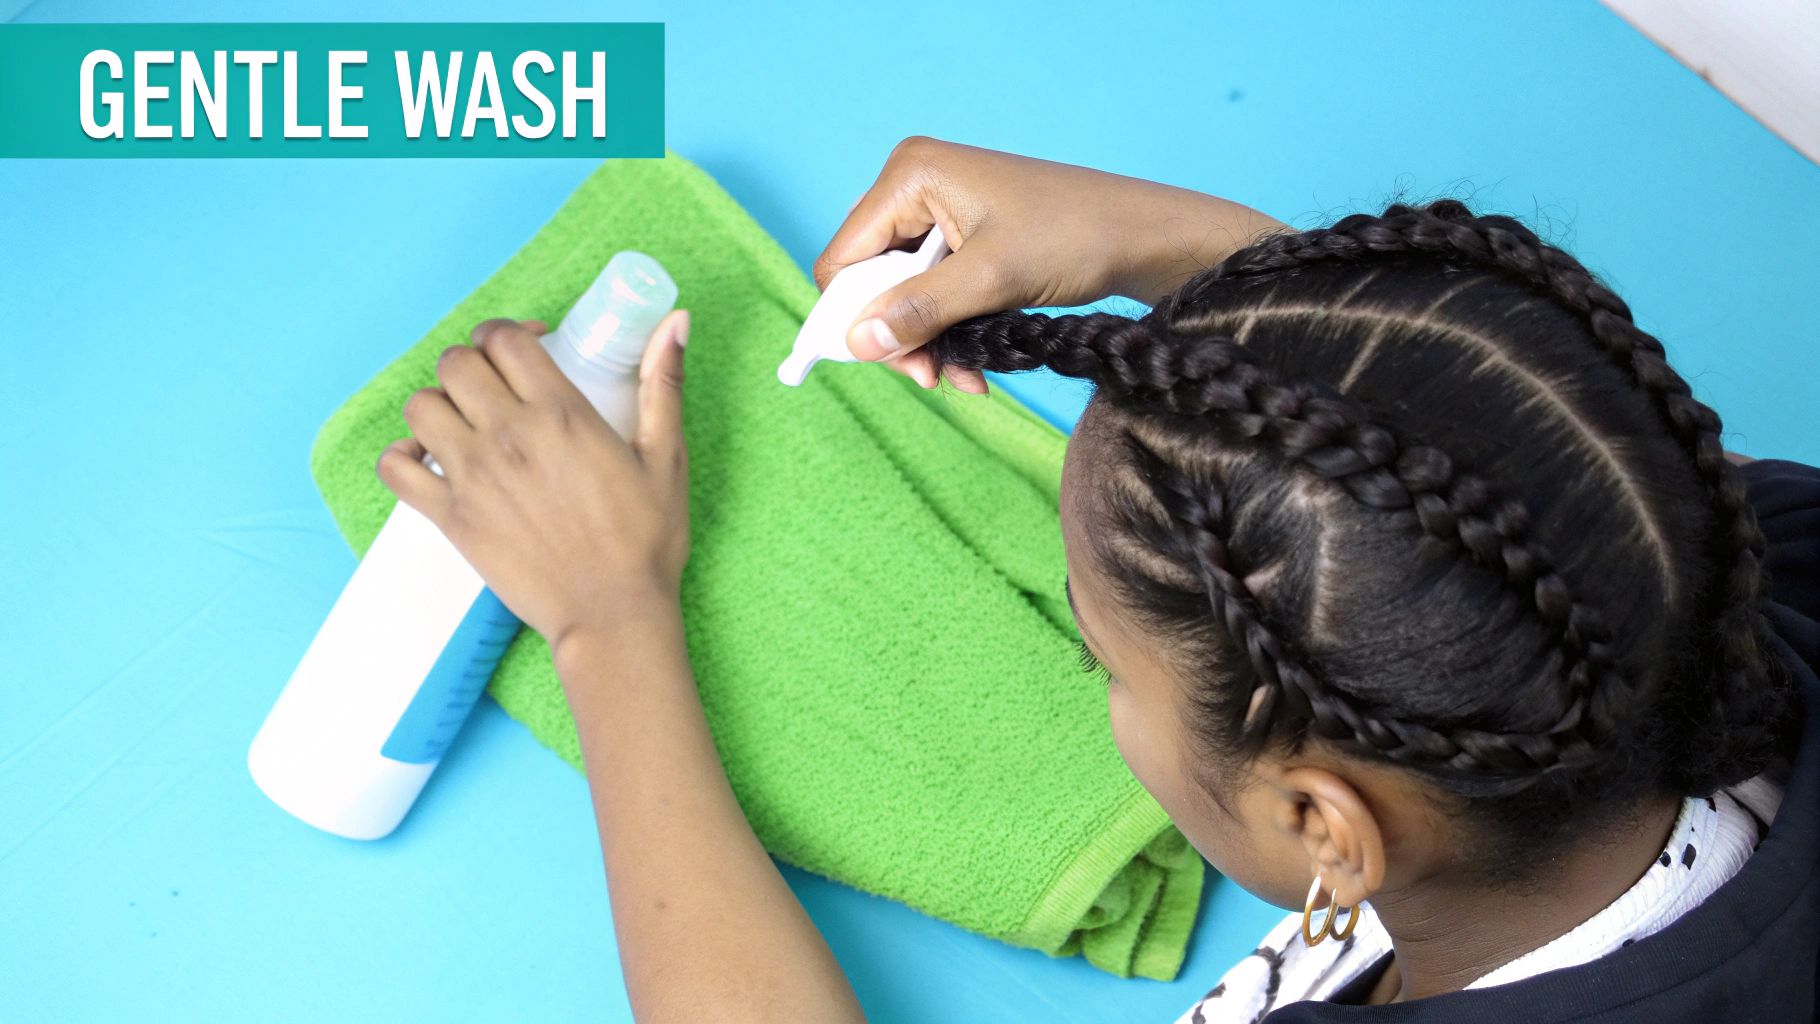
The Dilution Method for a Gentle Cleanse
Your new best friend for washing braids is a simple applicator or spray bottle. Whatever you do, never pour thick shampoo directly onto your braided hair. It’s a nightmare to rinse out completely and is a fast track to tangles and buildup. Instead, you're going to mix up a gentle cleansing solution that’s easy to control.
In your bottle, combine a good sulfate-free shampoo with warm water. A solid starting ratio is about one part shampoo to four parts water. Give it a good shake until you have a watery, slightly sudsy liquid. This diluted mix is perfect because it flows right where you need it—between your parts and onto your scalp—without globbing up on the braids themselves.
The biggest mistake I see people make is scrubbing their braids like they're washing loose hair. That creates instant frizz. The diluted spray method is a total game-changer because it lets you clean exactly where you need to without disrupting the style.
Mastering the Scalp Massage Technique
With your diluted shampoo ready, it’s time to get to work. Start parting your braids to expose your scalp and spritz the shampoo mixture directly onto your skin. The goal isn't to drench the braids themselves, just to focus on your roots and the scalp in between.
Once you’ve applied it, use the pads of your fingers (never your nails!) to gently massage your scalp in small, circular motions. This is what actually lifts the dirt, oil, and product residue. Think of it less like a rough scrub and more like a careful massage that cleanses while stimulating blood flow. Take your time and work your way across your entire scalp, from your hairline all the way to the nape of your neck.
For a really effective wash, follow this gentle routine:
- Saturate the Scalp: Methodically go through your hair, spraying the diluted shampoo along every part line to make sure you get full coverage.
- Massage, Don't Scratch: Use your fingertips to gently work the lather into your scalp for a couple of minutes.
- Let It Sit: Give the shampoo a minute or two to sit and break down any stubborn buildup.
- Rinse Thoroughly: Let warm water run down your head, gently squeezing the braids as it flows to help guide the suds out.
Rinsing and Conditioning the Right Way
Rinsing is just as crucial as the wash itself. You have to be patient here and make sure every last bit of shampoo is gone. Any residue left behind can cause serious dryness and scalp irritation. Stand under the shower and just let the water run through your hair for several minutes, gently squeezing the length of your braids to help push the water and suds out.
Now, what about conditioner? A thick, creamy rinse-out conditioner is a bad idea—it’s just too hard to get out of intricate braids. A much better choice is a lightweight, spray-on liquid leave-in conditioner. A light mist over your braids is all you need to restore a little moisture and softness.
Proper washing is non-negotiable for healthy braids. Most experts recommend gently washing your braids every 7-10 days using this method. Skipping wash day can lead to 30-50% more breakage from weak roots and scalp issues. You can find more insights on this in the latest analysis of the global hair braiding market.
The Crucial Final Step: Drying Your Braids
Please, do not walk around with damp braids. It’s a recipe for disaster. Trapped moisture can lead to mildew, a musty smell, and even fungal issues on your scalp. You must get your braids completely dry after washing.
While air-drying is ideal for hair health, it can take hours—sometimes a full day. To speed things up, start by gently squeezing out as much water as you can with a microfiber towel or an old t-shirt. Avoid rough terrycloth towels, which create friction and frizz. Wrap your hair in the towel for 15-20 minutes to soak up that initial excess water.
After that, you can let them air-dry the rest of the way. If you’re in a hurry, you can use a blow dryer on a low heat and low speed setting. Focus the air on your roots to make sure your scalp gets completely dry first. And if you're dealing with frizz on synthetic styles, check out our guide on how to stop synthetic hair from tangling for some extra tips.
Daily Moisture and Scalp Care Routines
Think of your braids like this: the style is protective, but the hair inside still needs attention. It gets thirsty. If you neglect it, you’re on the fast track to brittle, breakage-prone hair and an irritated scalp—the exact opposite of what you want from a protective style.
The good news is that daily care doesn't have to be a huge time-suck. A simple, consistent routine is all you need to keep the hair tucked away inside those braids healthy and hydrated. It's all about getting that crucial moisture where it needs to go.
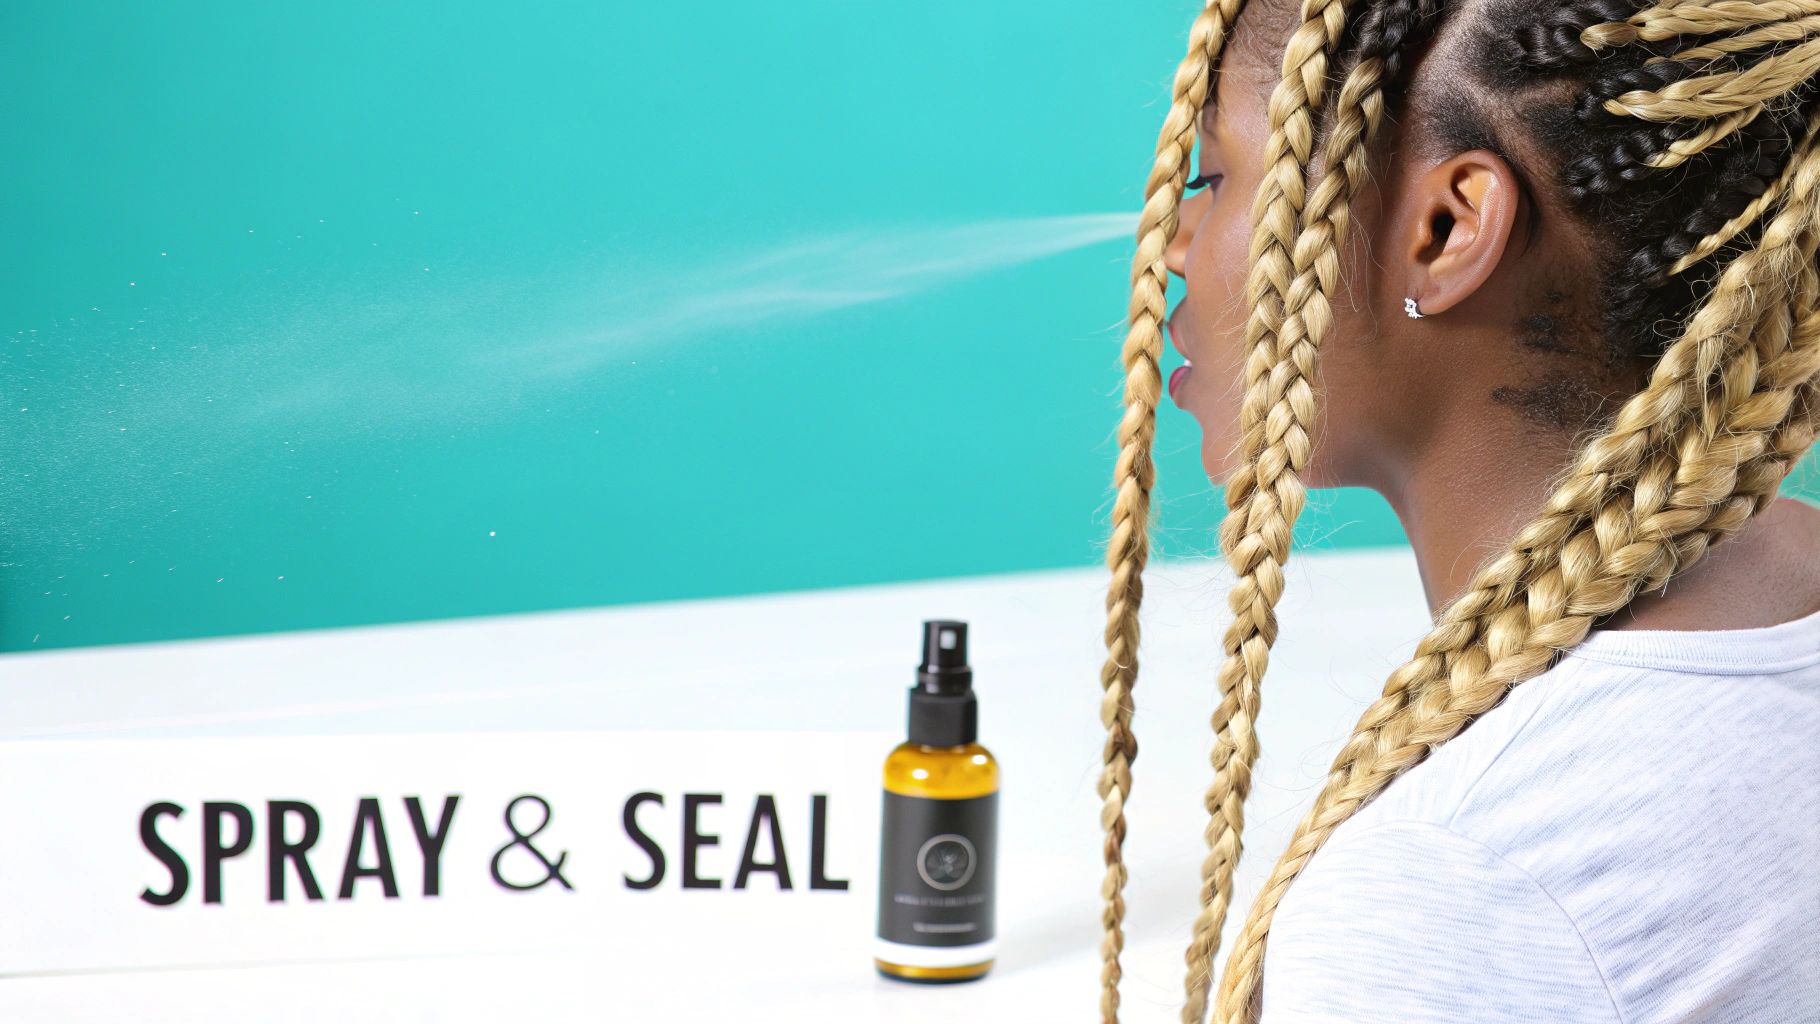
The Spray and Seal Method
One of the most effective ways to keep your braids hydrated is the "spray and seal" method. It’s a classic for a reason. This simple two-step process gets moisture into your hair and, more importantly, keeps it there.
First, grab a good water-based leave-in spray. You want to lightly mist your braids from the roots all the way down to the ends. The goal isn't to drench them, but to get them just damp enough for the spray to penetrate through the extensions and reach your actual hair. Remember, water is what truly provides hydration.
Then, you lock it all in. This is the "seal" part. Take a light oil—think jojoba, almond, or grapeseed—and apply a small amount to your hands. Rub them together to warm the oil up, then gently smooth it down the length of your braids. This creates a fine barrier that prevents all that water you just sprayed from evaporating, keeping your hair soft all day long.
A common mistake is just slathering oil on dry braids. Oil itself isn't a moisturizer; it's a sealant. If you put oil on dry hair, you're just sealing in the dryness, which can actually make your hair even more brittle over time.
Soothing an Itchy and Flaky Scalp
Let’s be real, an itchy scalp is one of the biggest annoyances with a fresh set of braids. It could be from the tension of the new install, dryness, or even a bit of product buildup. Whatever the cause, the absolute worst thing you can do is scratch. That just leads to inflammation and potential damage to your follicles.
Instead, reach for a targeted scalp treatment. A quality scalp serum or oil can be a lifesaver. Look for products with ingredients known to calm things down:
- Tea Tree Oil: A natural powerhouse, its antifungal and antibacterial properties are fantastic for fighting flakes and irritation.
- Peppermint Oil: This one gives you that instant cooling, tingling sensation that provides immediate relief from the itch.
- Aloe Vera: Known for its soothing properties, it helps calm inflammation while adding lightweight moisture directly to your scalp.
For a quick DIY fix, you can mix a few drops of tea tree oil with a carrier oil like jojoba in an applicator bottle. This lets you apply it directly to the itchy spots for targeted relief. If the itch just won't quit or you're seeing painful bumps, it might be time for a specialized product. We have a whole guide on finding the best braid spray for itching that can help you find the right solution.
Establishing Your Daily Care Cadence
So, how often should you be doing all this? The honest answer is: your hair will tell you. For most people, a light daily misting and sealing routine is perfect. But if your hair is extra thirsty (high porosity) or you're in a super dry climate, you might need to do it a bit more often.
Here’s a great starting point for a routine you can actually stick to:
| Frequency | Action | Product Suggestion (from Elise Beauty Supply) |
|---|---|---|
| Daily (or every other day) | Lightly mist braids with a water-based spray. | African Pride Braid Sheen Spray adds moisture and shine. |
| 3-4 Times Per Week | Seal moisture with a light oil and oil the scalp. | Use Mielle Rosemary Mint Scalp & Hair Strengthening Oil. |
| As Needed | Apply a soothing serum directly to the scalp for itching. | Look for scalp treatments with tea tree or peppermint. |
This consistency pays off in a big way. Industry research shows just how much this kind of care matters, especially with braids becoming more popular. For example, oiling the scalp just 3-4 times weekly has been shown to reduce the risk of dandruff by 45%. On top of that, data reveals that properly hydrated braids can help you retain 35% more length over a six-week period.
Ultimately, a proactive daily moisture routine is the foundation of great braid care. It’s what ensures that when you finally take them down, your hair is healthy, strong, and ready for its close-up.
Protecting Your Braids While You Sleep
Your daytime braid care routine is only half the story. Honestly, what you do for those seven or eight hours at night can make or break your style. Tossing and turning on the wrong pillowcase creates friction, and that's the number one enemy of neat braids. It leads to frizz, loosens your roots, and puts way too much stress on your delicate edges.
Think of a standard cotton pillowcase as a tiny bit of velcro for your hair. All night long, it’s grabbing and pulling at your braids. That constant rubbing is exactly why you get that fuzzy halo of flyaways that can make a fresh style look a week old overnight. Luckily, the fix is simple but incredibly effective.
The Magic of Silk and Satin
The secret to waking up with braids that still look sharp is to trade friction for glide. That's where silk and satin come in. These fabrics have a super smooth, tight weave that lets your hair move freely without snagging.
Making this one change can seriously cut down on the frizz and breakage that weaken your hair over time. You’ve got a few great options to make this happen:
- Satin Bonnet: This is my go-to for ease. You just pop it on, tuck your braids in, and you’re done. I always recommend finding one with a nice, wide, comfortable band that won’t leave a mark.
- Silk or Satin Scarf: A large scarf is perfect for a custom, secure fit. You can wrap it to give your edges extra protection without making it uncomfortably tight.
- Silk or Satin Pillowcase: Think of this as your backup plan. We all know that bonnets and scarves can sometimes slip off in the middle of the night. If that happens, your hair is still safe against a smooth surface.
Sleeping on a silk or satin surface isn't just a nice-to-have; it's a non-negotiable for keeping your braids looking good for weeks. This single habit can easily add another week or more to the life of your style by keeping frizz at bay and protecting your roots from all that nightly rubbing.
Tying a Scarf That Actually Stays On
We've all been there: you tie a scarf on perfectly, only to wake up and find it next to your pillow. To get it to stay put, try this method. Fold a large square scarf into a triangle. Lay the longest flat edge across your front hairline, and then tie the two ends at the base of your neck. Take that third corner of the triangle, pull it up, and tuck it securely into the knot you just made.
Just make sure the knot is snug, but not so tight that you're giving yourself a headache. The goal is protection, not tension.
Dealing with Long or Heavy Braids at Night
If your braids are long and heavy, letting them hang loose under a bonnet can feel bulky and even pull on your scalp. The best way to handle this is to gently gather them into a high, loose bun—kind of like a pineapple—right on top of your head.
Use a snag-free tie, like a big satin scrunchie, to hold it in place before putting on your bonnet or scarf. This little trick takes the weight off your neck and scalp while you sleep, making you more comfortable and helping preserve the style. It’s a small step that makes a world of difference.
How to Safely Remove Your Braids
All good things must come to an end, and that includes your beautiful braids. While it's tempting to push your style to its absolute limit, knowing when and how to take them down is just as important as the daily care you've been practicing.
Safe removal is your final, critical step in caring for braided hair and preserving all the length you've protected. Don't undo weeks of great care with a rushed takedown.
So, how long is too long? Most stylists agree that the sweet spot for wearing braids is between six to eight weeks. Going longer than this can lead to serious matting at the roots, where your natural shed hair and new growth get tangled together. This buildup not only puts stress on your follicles but also makes takedown a nightmare, often leading to breakage you could have easily avoided.
The Gentle Takedown Process
Patience is the name of the game here. Rushing through the removal process is a surefire way to cause damage and lose precious hair. Before you even think about unbraiding, set aside a good chunk of time, put on your favorite show, and get your tools ready.
First, you’ll want to trim the ends of the braids. Be conservative! Make sure you cut well below where your natural hair ends—it's always better to be cautious and trim a bit lower than you think you need to. Accidentally snipping your own hair is a mistake you only make once.
Next, mix some water and a slippery conditioner in a spray bottle. This simple concoction will be your best friend, giving you the slip needed to gently unbraid each plait without causing friction. Using a rat-tail comb, carefully undo the braid from the bottom up. As you unravel, you’ll see the buildup of shed hair; this is totally normal.
Navigating the Post-Removal Detangle
This is where the real work begins and where most damage can happen. Your hair has been tucked away for weeks, and all the hair that would have naturally shed daily is now tangled up at the base of each braid. It can look alarming, but don't panic. The average person sheds 50-100 hairs per day, so what you're seeing is just an accumulation of that.
Work in very small, manageable sections. Take one unbraided section, saturate it with a detangling conditioner, and begin to gently separate the shed hair from your new growth with your fingers. This is called finger detangling, and it allows you to feel for knots and carefully work them apart without the harsh pulling of a comb.
The most critical mistake people make is trying to detangle their entire head of hair at once on dry hair. You must work in small, heavily conditioned sections. This is the moment that determines how much length you truly retain from your protective style.
Once you’ve finger-detangled a section, you can then go in with a wide-tooth comb to ensure all knots are gone before moving to the next.
Properly protecting your hair at night while it's braided is a key part of making takedown easier down the road. Less friction means less tangling.
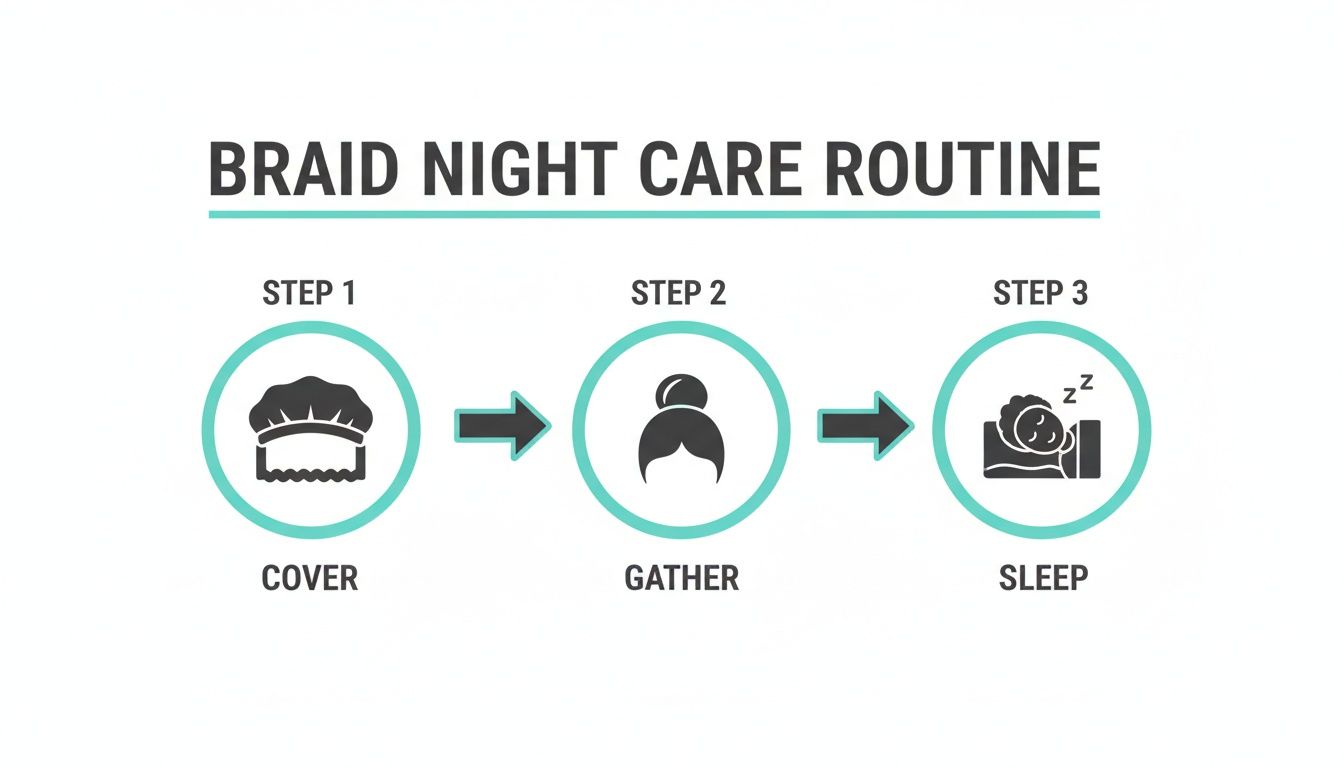
This simple flow—cover, gather, and sleep on a gentle surface—really does minimize friction and preserve your style longer.
When you finally get to the takedown part of your journey, avoiding common mistakes is crucial for keeping the hair you've worked so hard to grow.
Braid Takedown Do's and Don'ts
| Do This | Don't Do This |
|---|---|
| Work on damp, conditioned hair. Slip is your best friend for preventing breakage. | Attempt to detangle dry. This is a recipe for snaps, knots, and frustration. |
| Start from the ends and work up. This gently removes tangles without creating bigger knots. | Rip a comb from root to tip. This will cause immediate and unnecessary breakage. |
| Use your fingers first. Feel for knots and gently pull them apart before a comb touches your hair. | Rely only on tools. A comb can't feel a delicate tangle the way your fingers can. |
| Work in small, manageable sections. It's tedious, but it’s the only way to be thorough and gentle. | Try to detangle your whole head at once. This creates a matted mess and is overwhelming. |
Following these simple rules can make the difference between retaining length and starting over.
Final Steps to Restore Your Hair
After every last braid is out and your hair is fully detangled, it’s time for a restorative wash day. Your hair and scalp need a complete reset after being under wraps for so long.
Start with a clarifying shampoo to thoroughly remove any lingering product buildup, oil, and grime from your scalp and strands. Follow this with an intensely hydrating deep conditioning treatment. Let the conditioner sit for at least 30 minutes under a plastic cap; your body heat will help it penetrate deeply.
This step is non-negotiable for replenishing moisture and restoring your hair’s elasticity. Your hair has earned this spa day, and this final act of care ensures it emerges from its protective style healthy, hydrated, and ready for whatever's next.
Your Braid Care Questions, Answered
Even with the best routine, questions are bound to pop up. It's totally normal—braids have their own rulebook, and getting the hang of it takes a little time. Here are answers to some of the most common things people wonder about, so you can wear your style with total confidence.
Think of this as your go-to guide for those "is this normal?" moments. From that annoying new-braid itch to keeping your style fresh through a workout, getting the right info makes all the difference.
"My New Braids Are So Itchy! What Can I Do?"
That post-install itch is a classic. It’s usually caused by the tension on your scalp or just plain dryness. The best way to tackle it is with a soothing treatment right at the root. A few drops of a light oil, like peppermint or tea tree (mixed into a carrier oil like jojoba), can work wonders for instant, cooling relief.
You could also grab a dedicated anti-itch spray, like one from African Pride. Just be sure to avoid thick, heavy greases. They might feel good for a second, but they'll clog your pores and can make the itchiness even worse down the line. A gentle scalp massage also helps by boosting blood flow and easing some of that tension.
A new style should feel good, not painful. If the itchiness comes with bumps, persistent pain, or a headache that won't quit, your braids are too tight. This isn't something to push through, as it can lead to traction alopecia.
"How Can I Make My Braids Look Fresh Again After a Few Weeks?"
Bringing your braids back to life is all about a quick, three-step refresh. It’s amazing how this little routine can make your style look a week younger.
First, focus on your scalp without doing a full wash. Just take a cotton pad or cloth dampened with a little witch hazel and gently wipe between your parts. This lifts away any product buildup or oil, making your scalp feel clean instantly.
Next, grab a lightweight styling mousse and smooth a light layer down the length of your braids. This is the secret to taming frizz and flyaways while adding back a healthy-looking sheen. To finish it all off, give your edges some love. Clean up the area and re-lay them with a good, non-flaking edge control for that crisp, just-left-the-salon look.
"Can I Still Work Out with My Braids?"
Of course! Braids are actually one of the best styles for an active lifestyle. The trick is all in how you manage them during and after your sweat session to keep them from getting frizzy or smelling less than fresh.
Before you start your workout, pull your braids up into a high, loose bun or a simple ponytail. Getting them up and off your neck and back is the most important step, as it keeps them from soaking up a ton of sweat.
What you do after is just as crucial. Keep a small spray bottle with water and a few drops of tea tree oil (it’s naturally antibacterial) on hand. Lightly mist your scalp, then make sure it dries completely. You can let it air-dry or hit it with a blow dryer on the cool setting to speed things up. This little step is a game-changer for preventing mildew and keeping your scalp healthy.
"How Do I Know If My Braids Are Too Tight?"
Your body sends out some pretty clear signals when a style is causing too much stress on your scalp. You just have to know what to look for.
Watch out for these warning signs:
- A nagging headache: If you have a dull, constant headache right after your appointment, that’s a huge red flag.
- Little bumps or redness: See tiny, painful bumps around your hairline or scattered across your scalp? That’s folliculitis, and it means the follicles are being pulled way too hard.
- Soreness that lasts: A bit of tenderness for the first day is one thing. But if your scalp is still sore 48 hours later, the tension is a problem.
You should never have to pop a painkiller to feel comfortable in a new hairstyle. If you're dealing with any of these issues, the braids are causing damage that could lead to hair loss. Your best bet is to call your stylist right away. If that's not an option, spritzing your scalp with warm water can sometimes offer a little relief, but honestly, the safest move for your hair's long-term health is to take them down.
For all the essential products mentioned, from soothing scalp oils to refreshing braid sprays, explore the curated collection at Elise Beauty Supply. Find everything you need to keep your protective styles healthy and beautiful at https://elisebeautysupply.shop.